Sunday, April 13, 2014
Exhaust Outlet Elbow Shells
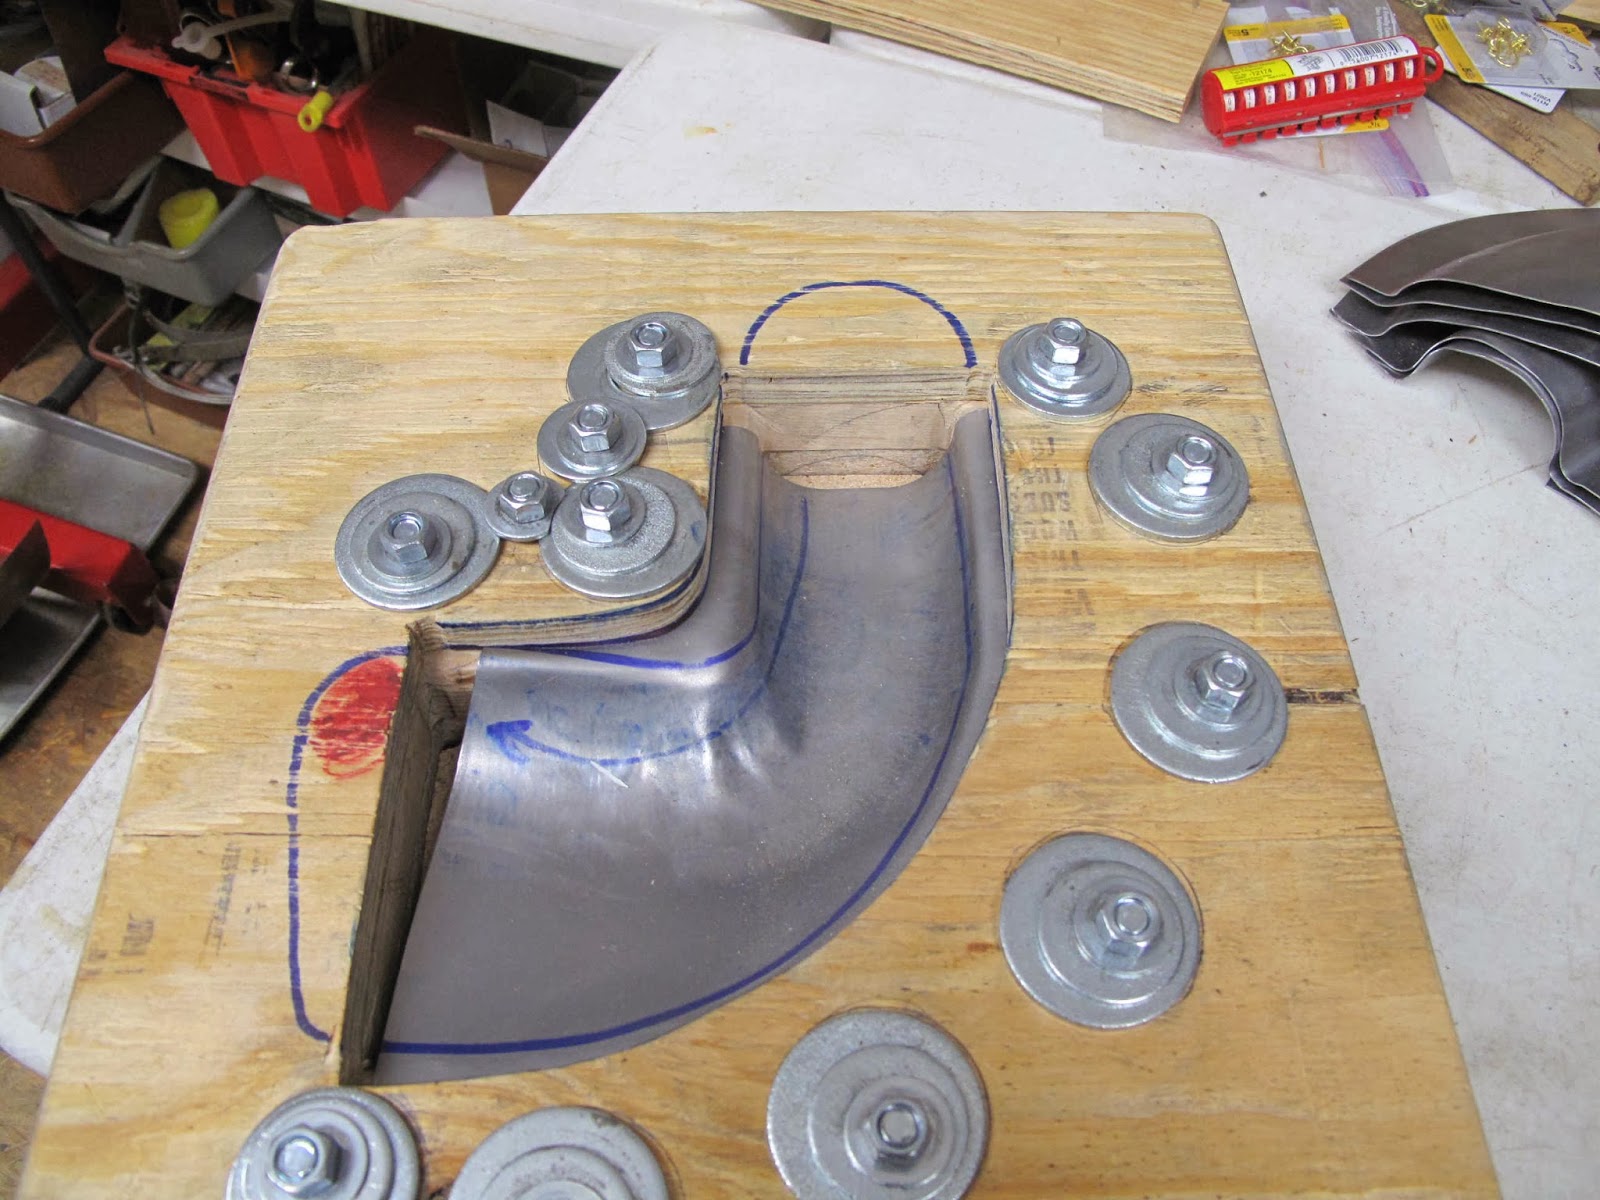
The outlet on the exhaust manifold goes into a 90 degree elbow. The inlet of the the elbow is round, about 2-3/4" diameter, and the outlet is teardrop shaped. The wide end of the teardrop is toward the front of the engine, like a streamlined strut. The construction is the same as the shells for the manifolds.
The form block was made by the same method as the new block for making the manifold shells. The center layer is particle board and the outer layers are made from blocks of ash glued together and to the particle board core.
To figure out the shape of the blank I assumed all the shaping would be done by letting the steel slide in the blocks rather than by stretching the steel. Strips of card stock were used to simulate the pulled metal and the flattened to mark the flat pattern,
With the flat pattern drawn on the block, the bolt hole locations were worked out by using the washers to see where pressure would be applied.
I sheered the blanks and then decided to try cutting them to shape with band saw. It worked great, much faster than snips or the nibbler.
I leave a gap at the ends. If the blank moves a little it won't hang up on the block.
As with the manifold, I used the scraps from the center layer and the plywood clamp block to make a tapered block to limit the depth the metal forms into the block.
The parts come out very well with about 20 minutes work.
One thing I had to work at was, to remember to stay on the leading edge side of the outlet to have the teardrop going the correct direction. I marked the block but found that drawing an arrow along the forward side worked as a better reminder.
I also made a large block from the ash to form the inlet end. It has the shape like the block I made for the outlet of the manifold. I also put a radius on one edge so it wouldn't crease the steel. The other edge is square to fit snug at the ends.
I start with the big block and get the shape started with the bolts tight. Then I loosen bolts as needed to get the steel to slide evenly from the edges.
The steel pivots on the inside flange as you work it. You pound the inlet down and the outlet moves up. To stop that I use a block of wood and a large c-clamp to hold the one end while working the other end.
With a couple of other wooden tools the shape is quickly formed.
Once the shape is correct the outside edge is lightly shaped to form a tight radius .
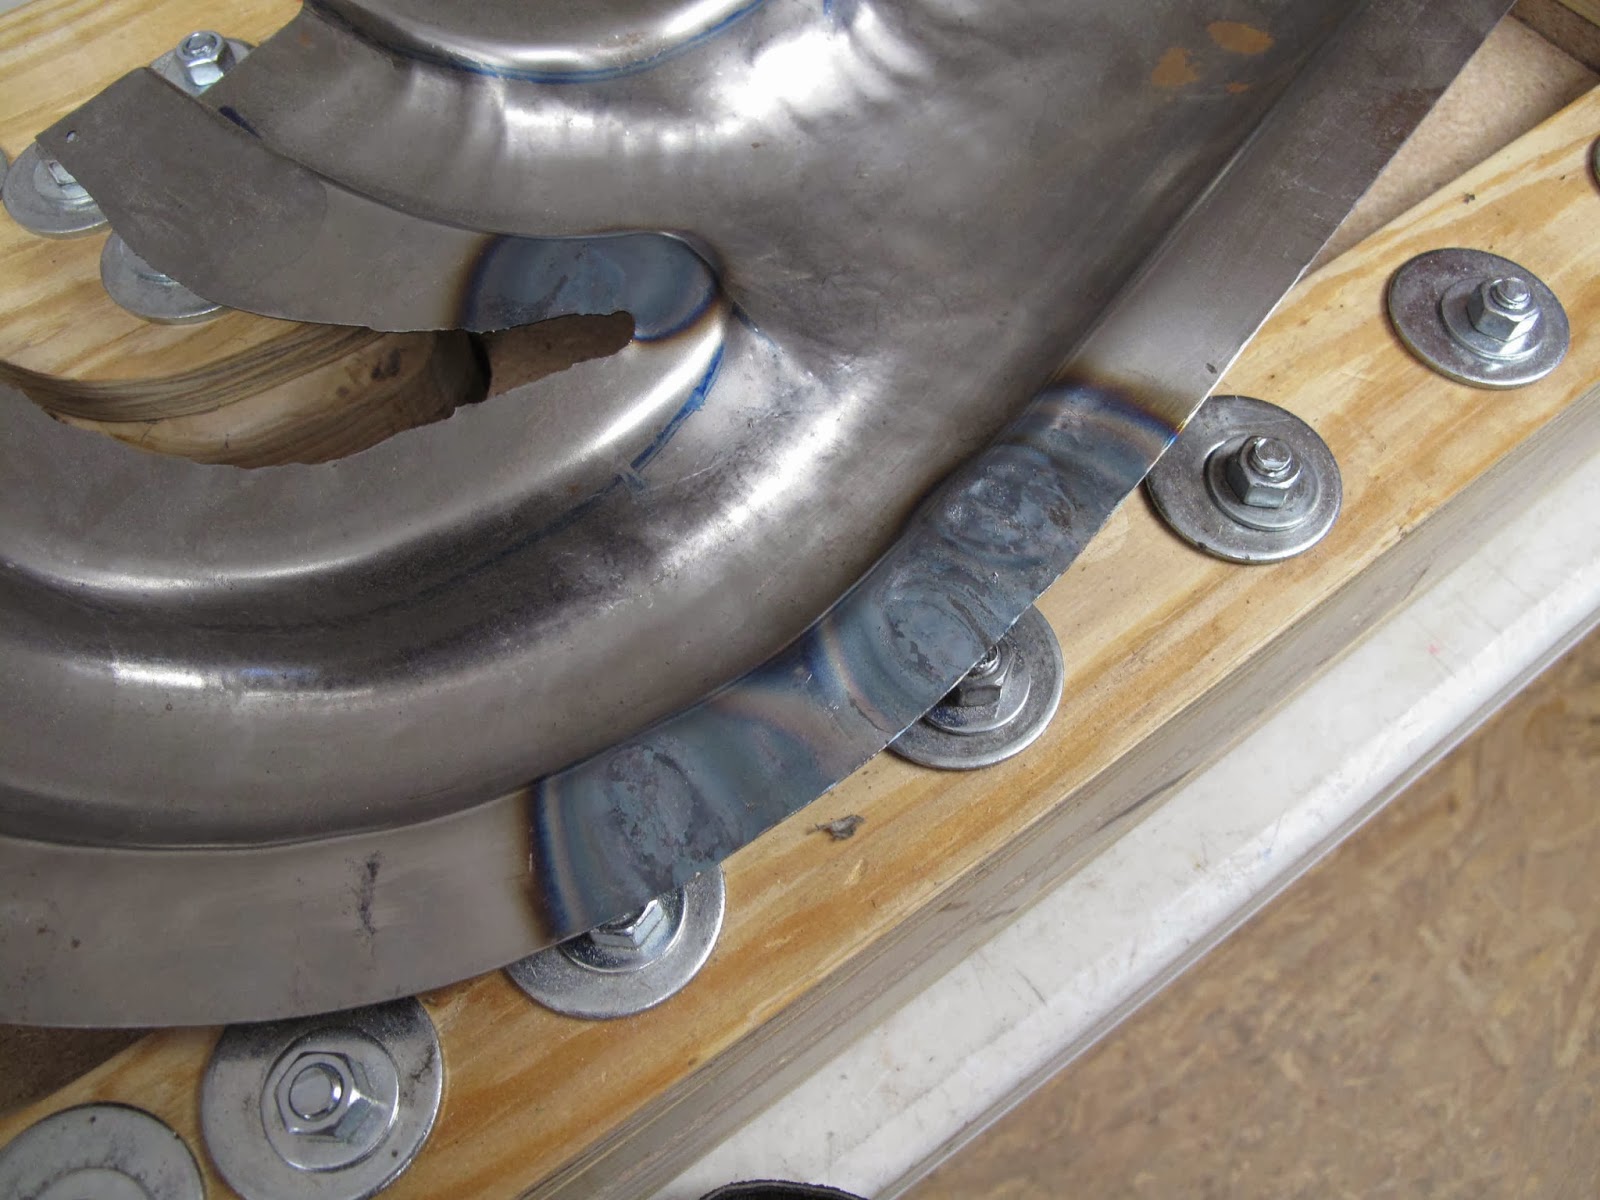
Occasionally wrinkles form in the inside corner which can not be easily worked out. The trailer hitch ball works well to shrink them back.
The blunt tool with the rivet gun works well to smooth the blend from the radius to the teardrop.
With the shaping done you can see the teardrop.
The inlet end will get rounded better when the 2 halves are welded.
As with the manifolds, any slight bumps are corrected with the planishing hammer and the trailer hitch ball.
The opposite half is made in the other side of the block.
They come out very well.
Tuesday, February 25, 2014
Improved Form Block
The original form block is still making good parts, but several people asked me about making manifolds for their engines. There are some changes I wanted to make to improve the process so this seemed a good time to make a new form block. The changes are small, like some added length to the inlet ends, better bolt locations and the use of hardwood for the outer (working) layers. I also only waxed the radii the metal slides on during forming to hopefully get a better grip on the flanges.
The center layer is made in the same manner as the original block. The opening was drawn with the template.
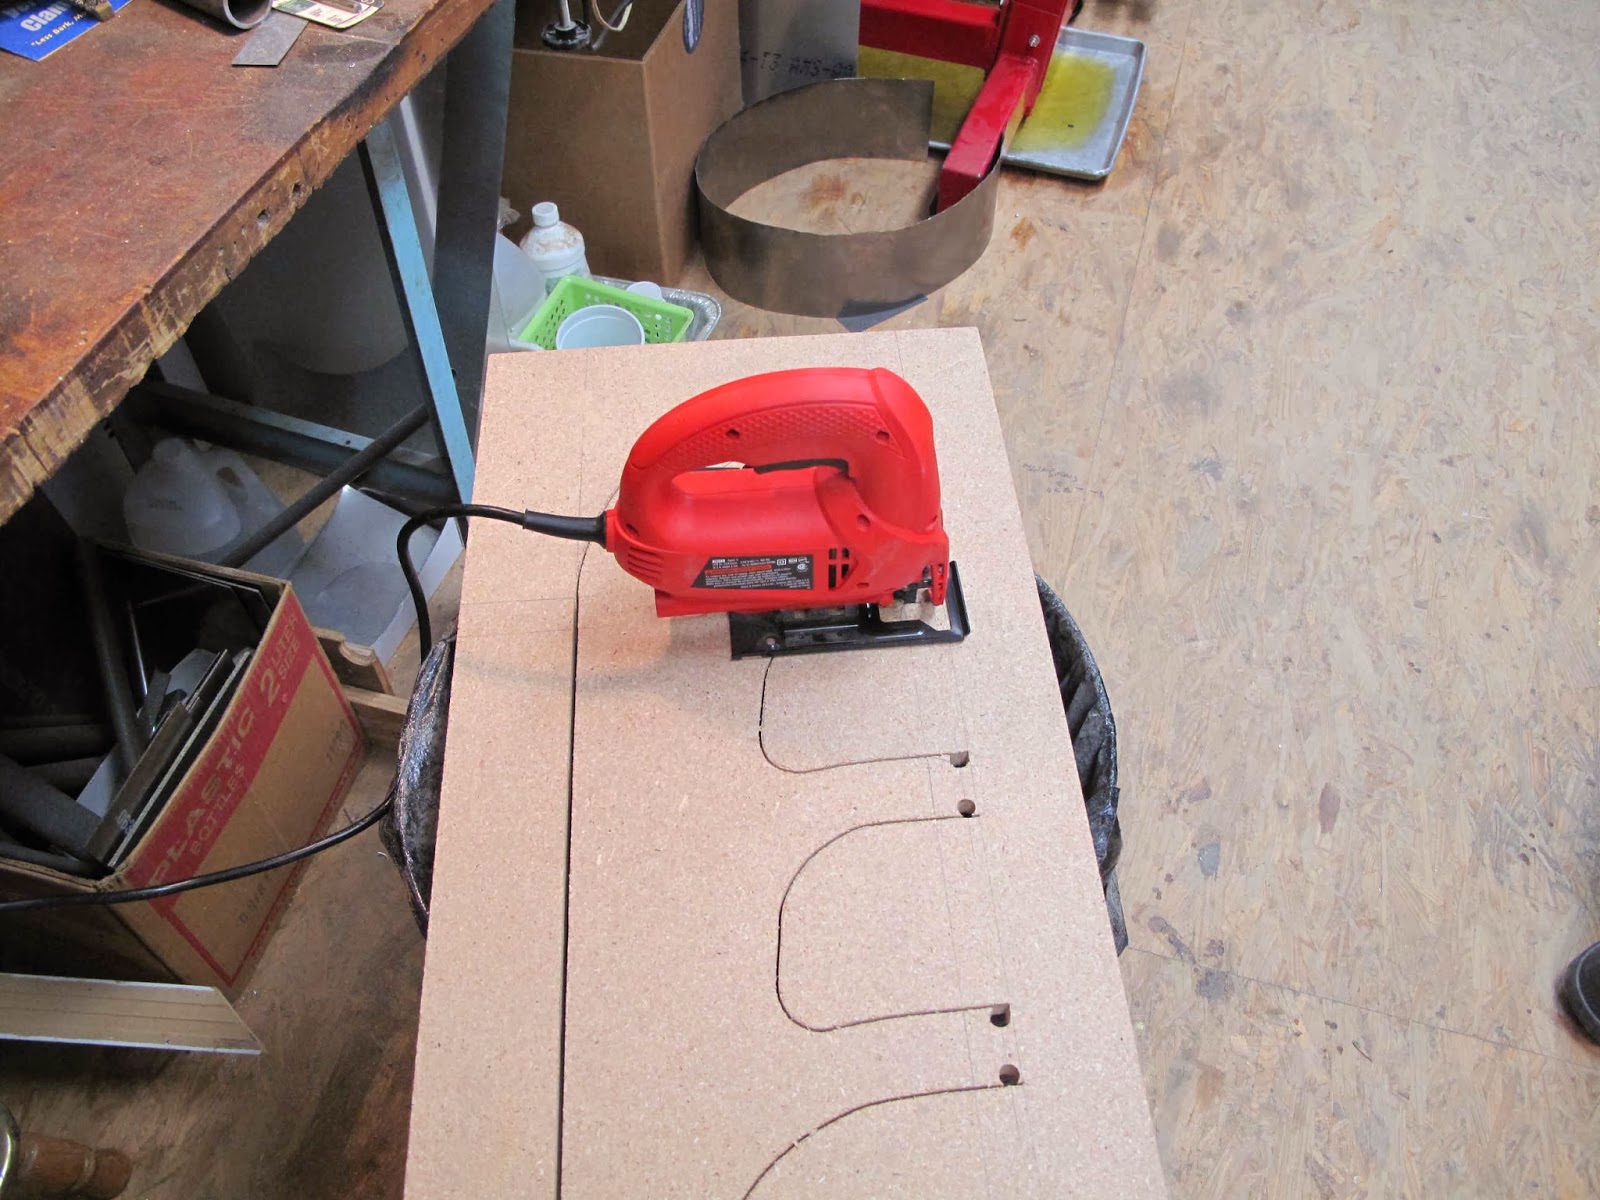
Holes were drilled at the corners to make it easier to cut with the saber saw.
The straight edge was cut on the table saw to get a nice straight edge.
The other cuts were made with the saber saw. The cut out piece will be used later to fill the hole to prevent over forming the shell.
With the hole cut out the hole was carefully filed and sanded to fit the template.
Instead of using particle board for the working layers I purchased some ash form a local saw mill and planned it to about 1" thick, just enough to clean it up.
As the boards were added the grain was aligned to have the steel slide with the grain to give the strongest edges to the block. You can faintly see my direction arrows on the center board.
The pieces were cut to leave a rough opening as was done with the particle board block so they could be matched to the center board with the router once all the pieces were glued on.
As pieces were added the corners were carefully cleaned of glue so each new piece could be tightly clamped in place.
Along with clamps to provide glue pressure cross clamps were used to tightly fit the pieces.
Once the block was glued the faces and edges were belt sanded to clean the up, and the corners were rounded.
The opening was then matched to the center board with a 1" Formica router bit and the 3/8" radius routed on the corners as on the original block.
The radii were waxed with 2 coats of Trewax (Carnauba paste wax).
The washers were positioned to work out the locations of the clamping bolts. No additional changes were made to the shape of the blank.
The bolts were positioned close to the blank to get the best clamping pressure.
Because the block was so heavy I started all the holes with a 4 1/2 center drill. It was just too hard to get the drill properly centered on the center punch mark. With a starter hole it was easy to see the drill was aligned properly before drilling.
The drill table was carefully squared using a piece of 3/8" rod before drilling with a drill 1/64" larger than the 3/8" bolts.
A piece of 3/4" plywood was again used on the bottom of the block and for the clamping board on top. Because the drill press was very square the top and bottom boards can be switched to make the 2 halves and all the bolts fit perfectly.
The center cut out piece is also used as part of the filler.
For the square inlets blocks of ash were made made to allow the steel to be hammered into shape with the modified 1 1/8" bolt. The radius on the right end it to provide a smooth transition from the square section to round. The 4 blocks just set in the inlet ends. The backing block (center scraps holds them in place).
They are numbered because they are each slightly different to fit the shape of each inlet.
The manifold thickness tapers form inlet to outlet so I used the center scraps to make a backing block to better control the shape. I tapered the plywood piece with the belt sander.
The tapered plywood piece goes in the bottom with the particle board piece on top. It the particle board piece gets broken from pounding it's the cheapest and easiest to replace. It also make a nice surface to pound on.
The new form block is now ready for some steel.
There are a couple spots where wrinkles form. I've been hammering them cold to shrink them. I realized they would shrink better hot. I just heated the hump with the torch to red hot and then a quick blow with the hammer does the trick.
Because I used the template to make both the old and new blocks, the openings are so close to the same shape I was able to take a part I had started on the old block and finish it in the new block. Here it is ready for finishing.
Back to making shells!
The center layer is made in the same manner as the original block. The opening was drawn with the template.
Holes were drilled at the corners to make it easier to cut with the saber saw.
The straight edge was cut on the table saw to get a nice straight edge.
The other cuts were made with the saber saw. The cut out piece will be used later to fill the hole to prevent over forming the shell.
With the hole cut out the hole was carefully filed and sanded to fit the template.
Instead of using particle board for the working layers I purchased some ash form a local saw mill and planned it to about 1" thick, just enough to clean it up.
As the boards were added the grain was aligned to have the steel slide with the grain to give the strongest edges to the block. You can faintly see my direction arrows on the center board.
The pieces were cut to leave a rough opening as was done with the particle board block so they could be matched to the center board with the router once all the pieces were glued on.
As pieces were added the corners were carefully cleaned of glue so each new piece could be tightly clamped in place.
Along with clamps to provide glue pressure cross clamps were used to tightly fit the pieces.
Once the block was glued the faces and edges were belt sanded to clean the up, and the corners were rounded.
The opening was then matched to the center board with a 1" Formica router bit and the 3/8" radius routed on the corners as on the original block.
The radii were waxed with 2 coats of Trewax (Carnauba paste wax).
The washers were positioned to work out the locations of the clamping bolts. No additional changes were made to the shape of the blank.
The bolts were positioned close to the blank to get the best clamping pressure.
Because the block was so heavy I started all the holes with a 4 1/2 center drill. It was just too hard to get the drill properly centered on the center punch mark. With a starter hole it was easy to see the drill was aligned properly before drilling.
The drill table was carefully squared using a piece of 3/8" rod before drilling with a drill 1/64" larger than the 3/8" bolts.
A piece of 3/4" plywood was again used on the bottom of the block and for the clamping board on top. Because the drill press was very square the top and bottom boards can be switched to make the 2 halves and all the bolts fit perfectly.
The center cut out piece is also used as part of the filler.
For the square inlets blocks of ash were made made to allow the steel to be hammered into shape with the modified 1 1/8" bolt. The radius on the right end it to provide a smooth transition from the square section to round. The 4 blocks just set in the inlet ends. The backing block (center scraps holds them in place).
They are numbered because they are each slightly different to fit the shape of each inlet.
The manifold thickness tapers form inlet to outlet so I used the center scraps to make a backing block to better control the shape. I tapered the plywood piece with the belt sander.
The tapered plywood piece goes in the bottom with the particle board piece on top. It the particle board piece gets broken from pounding it's the cheapest and easiest to replace. It also make a nice surface to pound on.
The new form block is now ready for some steel.
There are a couple spots where wrinkles form. I've been hammering them cold to shrink them. I realized they would shrink better hot. I just heated the hump with the torch to red hot and then a quick blow with the hammer does the trick.
Because I used the template to make both the old and new blocks, the openings are so close to the same shape I was able to take a part I had started on the old block and finish it in the new block. Here it is ready for finishing.
Back to making shells!
Subscribe to:
Posts (Atom)