


The mounting holes are oblong to fit on 5/16" studs. One hole in the fixture is centered on the outer end of this hole. The other is just touching the edge of the inside of the hole. The idea is to drill the 2 holes in the flange with a 3/16" drill, then drill the outer one with a 5/16" drill. To finish the hole I plan to use a 5/16" rat tail file and just file down to the bottom of the inside hole.
The inside hole also serves as a pivot for belt sanding the radius and flats on each end of the flange. This shape should simplify making the ends and give them a little more steel to stiffen them when bolted to the cylinder.

Using a 3/16" transfer punch the centers of the 6 holes are marked on the steel.
The end of the flange is scribed on the steel. Before I clamped the fixture on I used a blue felt marker to highlight this area. It's easier to see the scribe line when cutting the ends.


With the first part ready to drill the fixture is positioned to mark the next piece. The flanges are 3-1/2" long and I'm using a 48" piece of steel so I spaced them every 3-5/8" from each end. You get 13 pieces from the strip of steel.


To keep the piece flat on the table I de-burr each hole after drilling.
I need to locate the pivot hole over a 3/16" bolt so after drilling the holes I opened them up slightly with a #11 drill. The hole fits snugly over AN-3 bolts.


I made a wooden fixture to hold the steel while drilling at the 18 degree angle. At first I only made it wide enough to hold a part. It was easier to hold a strip with a few parts on it so I widened the area with the angle on it and drilled a clearance hole for drill chips to fall through.
I still had trouble with chips sticking to the wood. It was however a lot easier to make this from wood than steel.


Then it's just a matter of drill a hole, clean up the chips, de-burr the hole, and drill the next hole.


I used my block of plywood with a bolt sticking up as a fixture for cleaning up the ends and getting a nice radius.
A light touch to the belt in the opposite direction and you have a nice finished end ready for a quick de-burring with a mill file.


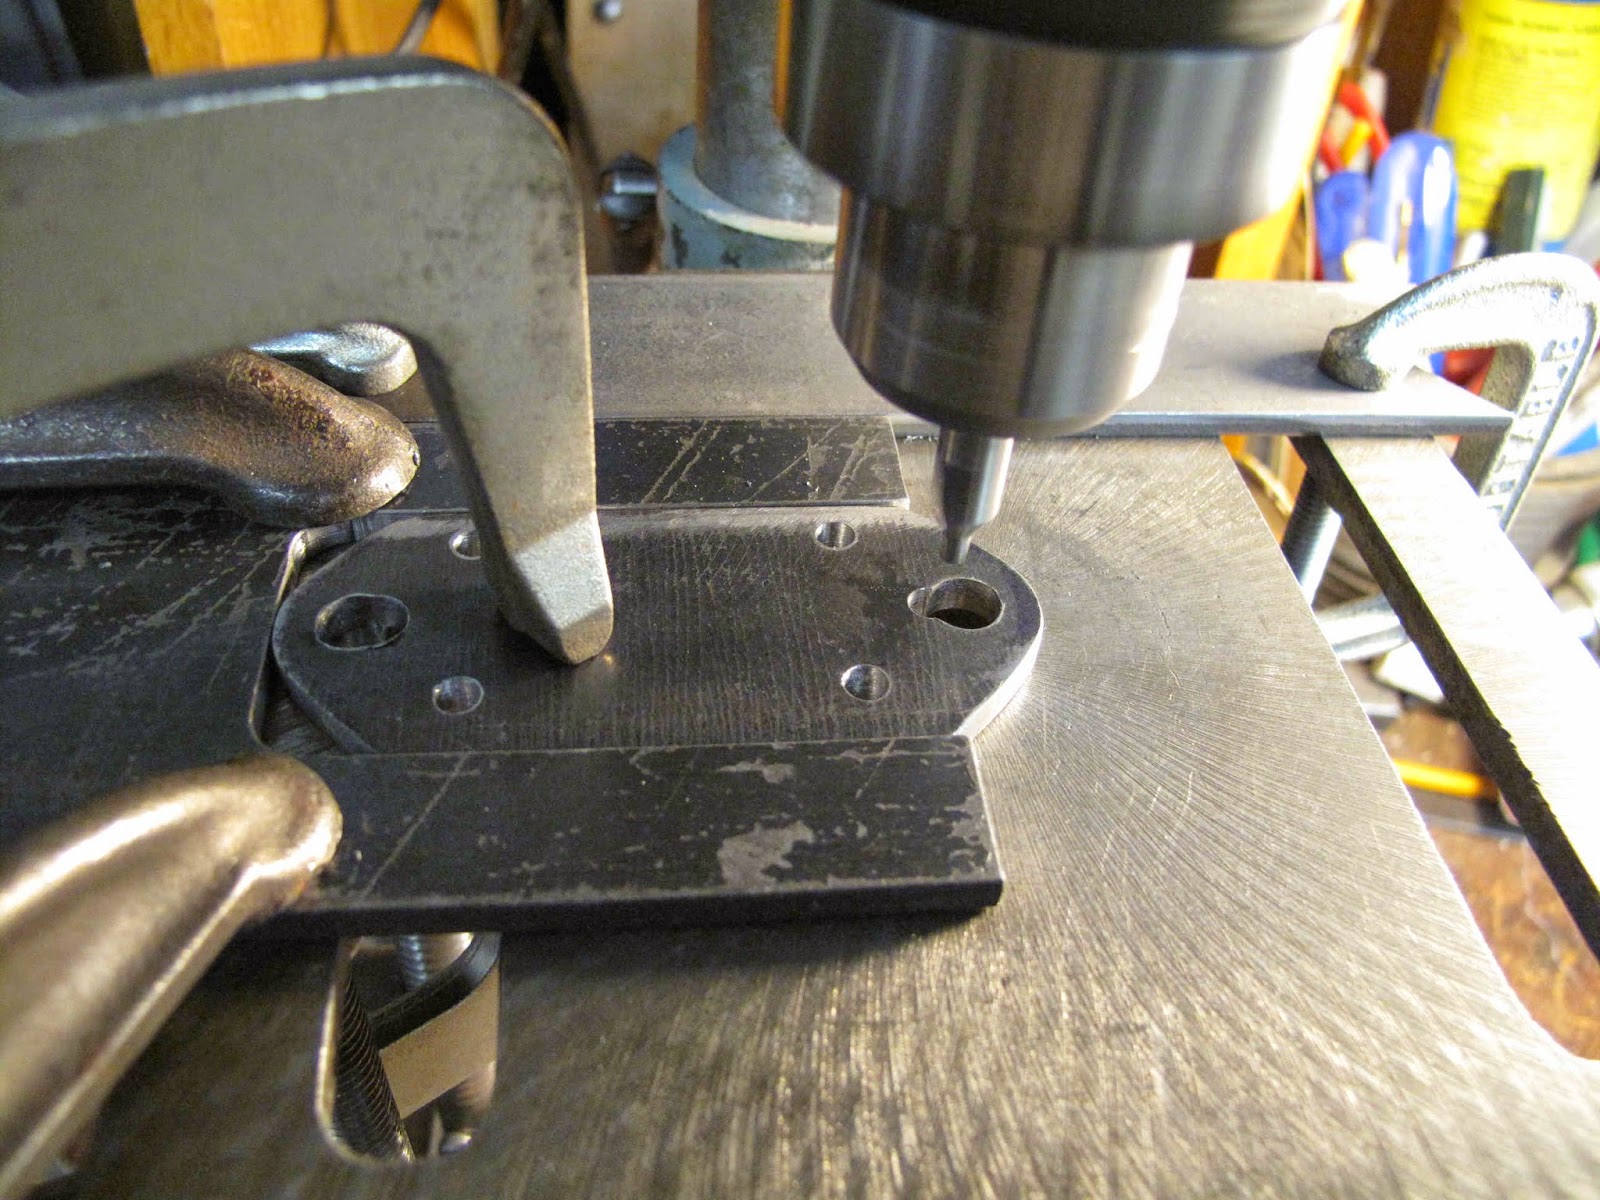
The next step was to increase the size of the bolt holes. I made a fixture to hold the flange while drilling. I've grown tired of parts whirling around the drill bit.
To locate the fixture I put the 3/16" bit in the drill and lowered it to the outer hole, then clamped the fixture to the table.


The difference is I want the edge of the 5/16" drill to line up with the edge of the 3/16" hole.
I started by using the 3/16" bit to locate the hole like with the outboard hole.


With the fence holding the fixture from moving fore and aft I measured the position of the fixture along the fence. I added 1/16" to this measurement and locked the vernier as a gauge to position the fixture 1/16" to the left so the 5/16" bit would now drill in the correct location.

After cutting out the inlet hole I'll finish this oval in the vise with a 5/16" rat tail file.
No comments:
Post a Comment