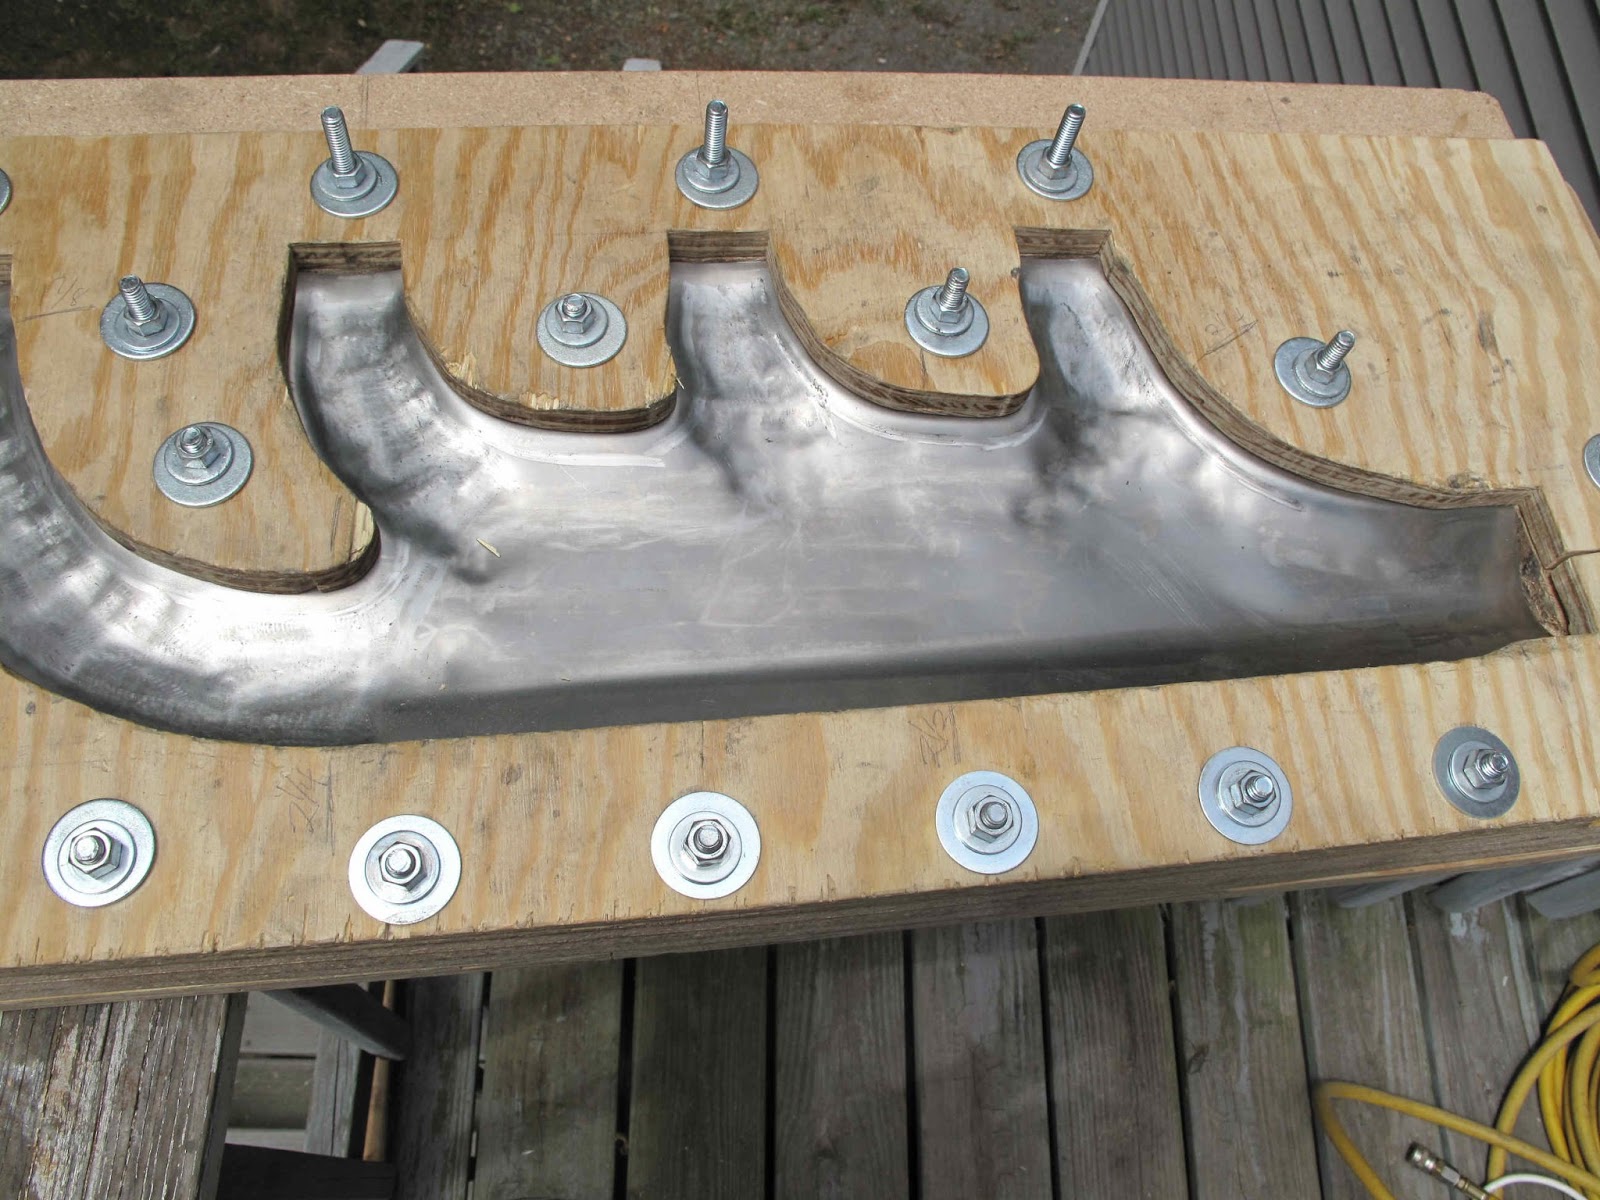
From the first piece I learned I needed a piece of wood under the flat section of the collector so It would end up flat not bulged in the center. To do that I needed a piece of wood which tapered 1/4" form the end of the first inlet tube to the outlet end. I decided to use the scrap cut from one of the layers since it would fit and stay in place without anything to hold it in position. I need to be able to flip it over to do the other side of the shell. To taper it I drew a guide line on each edge and the used a 24 grit disc on the sander. I smoothed it a little with the belt sander.
I started the forming with the along the edges with the narrow tool and then used it to start the shaping of the inlet tubes.
I used some 2" dowel to make some tools to form the collector area so it would have less dents when all done. I left the lower bolts loose while forming the collector so the steel would slide rather than just stretching.
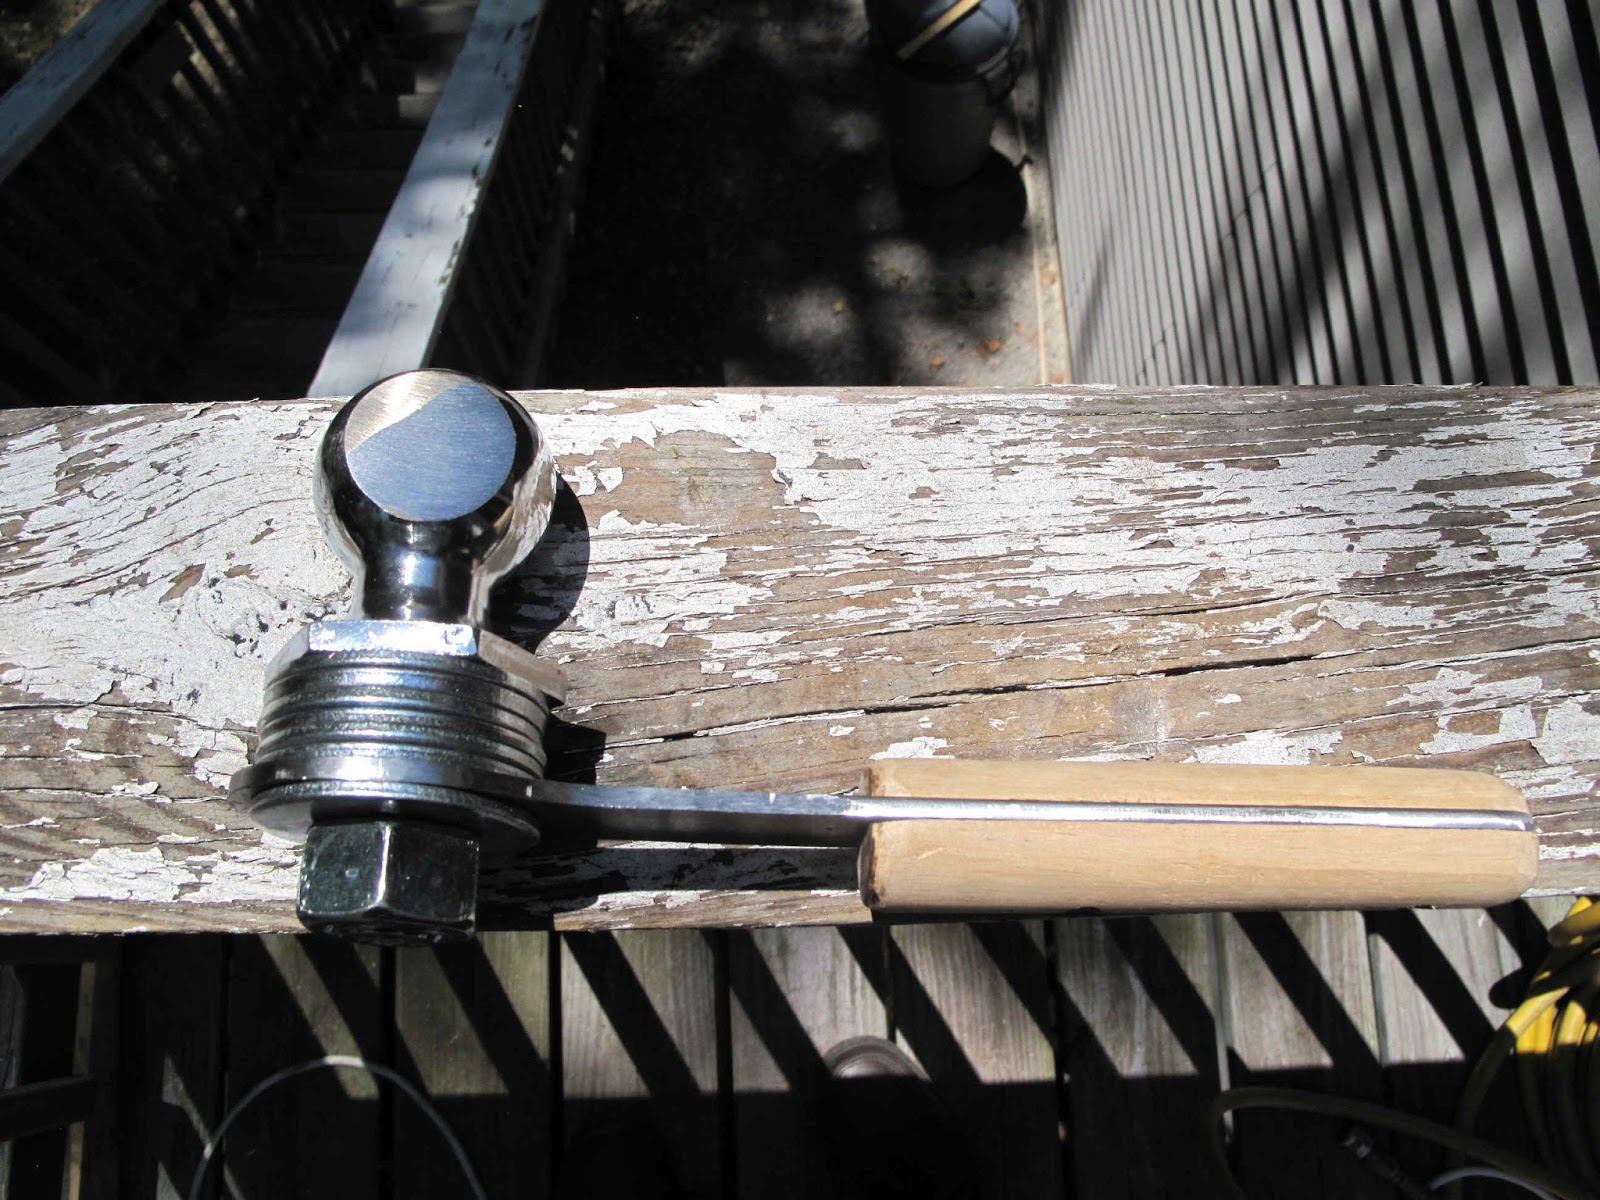
I decided to make a better forming tool using the 2 5/16" ball. Unfortunately it has a 1" threaded end. The other balls are 3/4" as is the hitch insert I used as a handle. I decided it was easier to make a handle then to modify the hitch end.
I used some scrap 3/16" x 3" steel from making the WACO NINE
nose rib forming tool. I sawed out a handle about a foot long with a 1 1/4" wide handle to fit some dowel I have. I made the ball end big enough to fit the base of the ball and cut a 1" hole with a hole saw.
For the handle I drilled 4 holes in the steel for screws to pass through. I split the dowel and ran 2 screws from each side though the steel into the other half of the dowel. I rounded the ends of the dowel for a nicer job.
I stacked enough 1" washers, from Tractor Supply, to get the nut flush with the threaded end of the ball.
The ball shape I wanted was more oval than the first ball. I ground flats on the 2 sides working to keep them equal distance form the center by eye and by making the flats the same diameter. I ground until the ball was 1.74" wide. I used the 24 grit disk on the disc sander. I was able to see what I was doing better and the 24 grit cut much faster. I still had to cool the ball from time to time.
Next I radiused the top on the 2 sides with the sander.
I then worked the top of the ball to a nice even curve from front to back.
With these curves established I blended in the corners. To finish it smooth I used the belt sander. There is an area at the top between the roller and the backing plate where the belt is unsupported. It works great for blending with less sharp edges on each pass. Next I lightly filed off high edges and then worked it in the palm of my hand with a piece of 120 grit belt to smooth it better. I finished it with Scotchbrite.
It's way better than the first one.
I turned the ball at an angle to make it comfortable to hold with the axis of the ball in line with the inlet ends of the pipes.
As you work down the pipe, holding the ball at about the same angle makes the ball naturally wider to fill the shape of the tube.
It really works great. This is what the first tube looks like after the first rough shaping pass. Very cool!


No comments:
Post a Comment