While making the exhaust flanges I broke one of my last 3/16" center drills and lost the last bit for my Vargus de-burring tool, so off to McMaster-Carr for some more center drills, bits for the de-burring tool and a new tool holder for it. The old holder was so worn after 40 years that the bit would not stay in. I asked for a new catalog, knowing I just don't buy enough anymore to rate a 4000 page tome like this. After much begging and offers to buy one or bribe a company official to get one they found one with a slightly damaged cover. It arrived today. It's wonderful. This will make finding things I need so much easier. The pages are bigger and it's over 1000 pages more than my old one. Oh yeah, the new tools work great also.
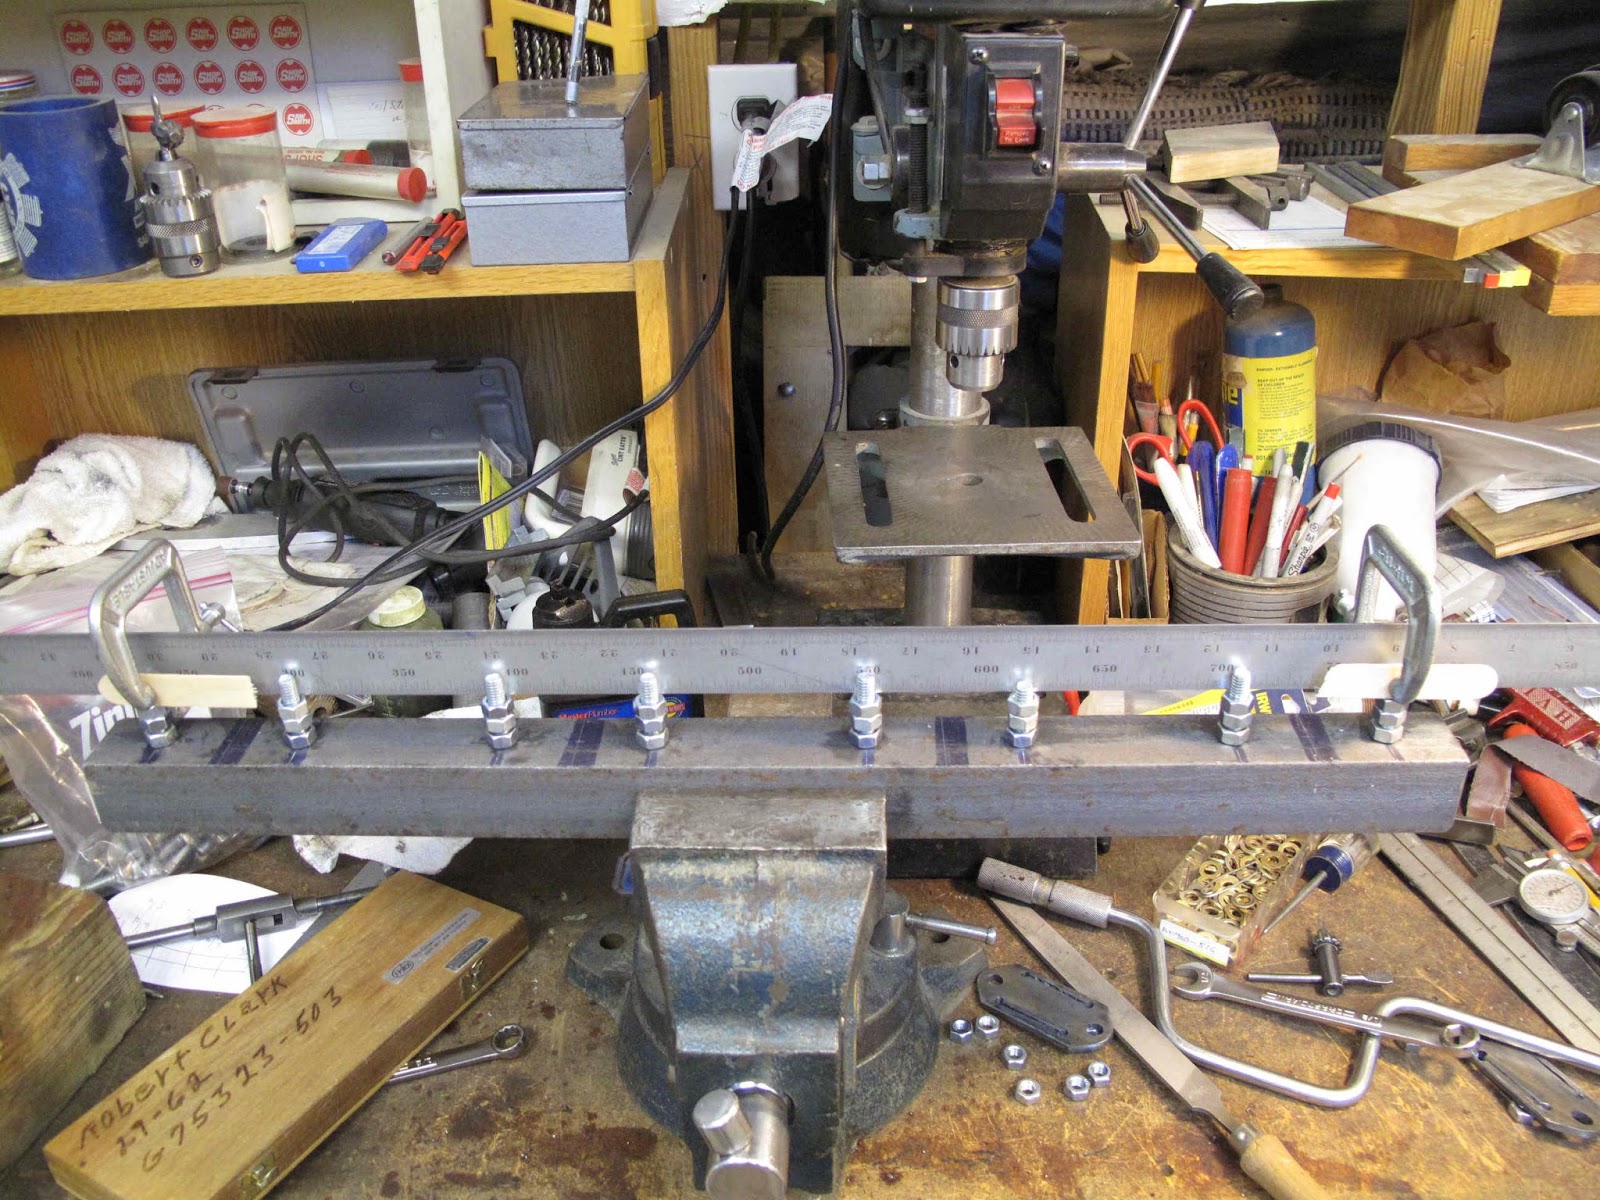
To hold the Flanges in the proper position, on the Manifold Shell, while welding I'm making a simple fixture from a 24" piece of 1-1/2" x 1/8" steel angle and some 5/16" bolts. The Cylinders are located 6-1/4" on centers and the exhaust studs are 2-5/8" on centers. I tapped the holes in the angle to get a snugger fit with the grade 2 bolts and then put a jamb nut tight to the angle.
The flanges rest on a stack of 2 nuts tightened together with room left at the end for the flange and a nut to hold it tight while welding.
To get the top of all the support nuts on a line I started by setting the nuts on the 2 end bolts first. This got the nuts the correct distance from the end of the bolts. Then it was just a matter of setting the others on the line.
At first I thought I could just clamp a straight edge to the 2 end bolts and adjust the rest to just touch it. It turns out you can't clamp it tight enough. You can create a lot of pressure when tightening the nuts and it pushes the straight edge away from the end nuts.
It also takes some care to tighten the top nut down while tightening the bottom one up to get the top nut just on the line.
The solution turned out to be easy and fairly quick. I let the straight edge rest on the 2 end nuts with all the others below the line. I then started with a nut just inboard of an end and raised it until the straight edge rocked on it. While holding the closest end down, I adjusted the nut down until the far end of the straight edge just touched it's end nut.
I then tightened the nuts together and readjusted them as needed until they just touched the straight edge while not letting it rock.
Then work on the same nut at the opposite end and slowly work toward the middle..
It worked great. The engine side of the flanges are all in line within a couple thousandths of an inch.
I found it easier to assemble the flanges to the shell and then mount them to the fixture. The ends of the shell line up the flanges while the fixture holds their faces on a plane so the gaskets can seal.
I need to add a support to hold the 18 degree angle while welding. The weather is warming so I may be able to start welding soon.


S.N Enterprises also offers complete Pipe Bending services, End Forming services, Pipe Flaring services in material MS, Aluminum, ERW, Stainless Steel, Copper, Titanium and others. View More: Pipe Bending Services
ReplyDelete